


** Note: This tutorial is only applicable for the software provided by this site, so at first download the 'EXPORT_MICROWIND_2.zip' from 'software collection' page of this website and then follow the next steps given below.
1. After downloading 'Export Microwind 2' from the provided page, now you have a zip file named 'EXPORT_MICROWIND_2.zip'. It is a compressed zip file, so it is necessary to upzip or extract it first. Follow the screenshot below:


Work with Microwind comfortably. Good Luck.
** Note: This tutorial is only applicable for the software provided by this site, so at first download the 'ORCAD 9.2 version' from 'software collection' page of this website and then follow the next steps given below.
Full installation procedure completes in three main parts:
** ORCAD Installation Steps:
1. After downloading 'ORCAD 9.2' from the provided page, now you have a zip file named 'ORCAD_9_2.zip'. It is a compressed zip file, so it is necessary to upzip or extract it before installation. Follow the screenshot below:


2. After completing above steps you will get a new folder named ORCAD_9_2 at the same place where downloaded zip file is located. This folder contains necessary files to setup this software in your PC.
3 Now disable the antivirus software of your PC.
* Open the extracted ORCAD_9_2 folder and find the 'Setup.exe' file and follow the next steps shown in screenshot below.


** ORCAD Web Updates:
2. After completing above steps you have to setup following three web updates:
These web updates contains necessary library files for various electronic parts. If you don't complete three web updates you will not find library files during work.
Enter into ORCAD_9_2\Orcad web Update\Capture92_WebUpdate1 folder. Find the setup.exe file and then follow the working steps shown below.


Now 'ORCAD web Update-1' is completed. Do same ORCAD web Update procedure for 'ORCAD web Update-2' and 'ORCAD web Update-3'
** Activation with License Files:
3. After completing all above steps you have to active 'ORCAD product tools' with license files. To do this enter into ORCAD_9_2\crack folder and find 'OrCAD.lic' file. Copy this file and paste it into four different locations listed below.
*** Replace all previous files when ask.
Enter into ORCAD_9_2\crack location and find the 'ORCADFNC.DLL' file. Copy this file and paste it into three different locations listed below.
*** Replace all previous files when ask.
Work with ORCAD comfortably. Good Luck.
* This setup procedure only applicable for the software provided by this site, so at first download the 'PSpice 9.1 student version' from 'software collection' page and then follow the next steps given below.
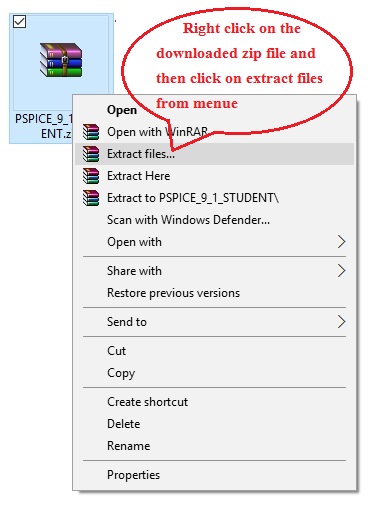
* After downloading 'PSpice 9.1 student version' from our provided page now you have a zip file named 'PSPICE_9_1_STUDENT.zip'. It is a compressed zip file so it is necessary to upzip or extract first. Follow the screenshot below:

* After completing above steps you will get a new folder named PSPICE_9_1_STUDENT at the same place where downloaded zip file is located. This folder contains necessary files to setup this software in your PC.
* Now disable the antivirus software of your PC.
* Open the PSPICE_9_1_STUDENT folder and find the 'Setup.exe' file and follow the next steps shown in screenshot below.


